Interior Cabinet & Full Repaint in Clackamas:
A Clean, Durable Finish from Top to Bottom
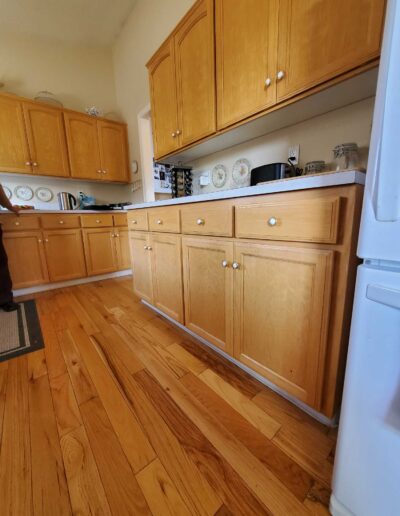
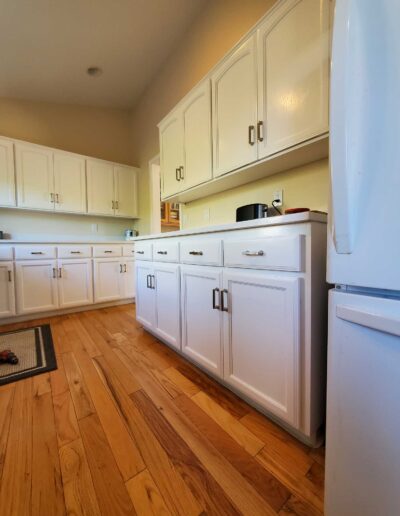
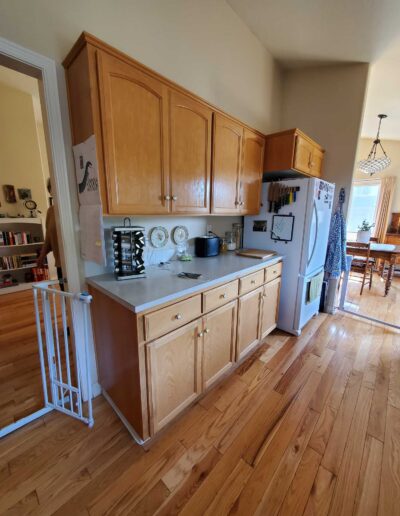
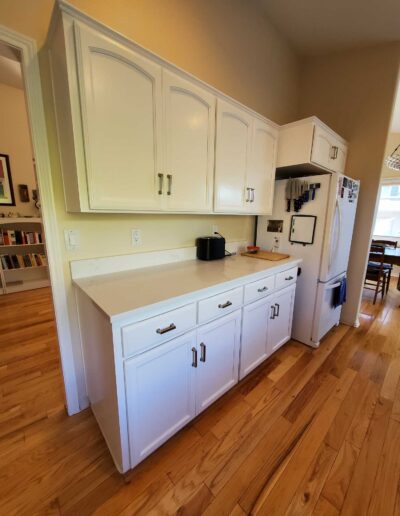
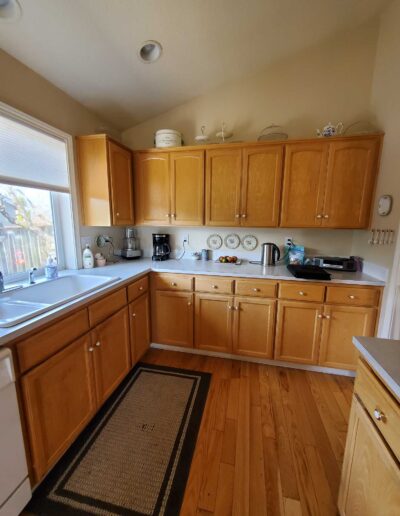
This interior repaint and cabinet refinishing project in Clackamas, Oregon was all about transformation and quality. The homeowner wanted a clean, updated look throughout the common areas—and we delivered with a full repaint of walls, ceilings, trim, and cabinetry, using both Sherwin-Williams and Miller products!
Step 1: Cabinet Disassembly and Spray Prep
We began by carefully removing all cabinet doors, drawer fronts, and hardware. Each piece was labeled, logged, and staged in a dedicated spray area for efficient reassembly later.
- A plastic-walled spray booth was constructed on-site to control overspray and dust, providing a clean space for finishing the cabinets.
- A ventilated air scrubber system was set up to manage fumes and airflow, keeping the environment safe and clean during the spraying process.
This level of containment ensures a professional-grade finish without impacting the rest of the home.
Step 2: Surface Prep & Primer Application
With the space secure, we began the prep process:
- All surfaces were thoroughly cleaned and sanded to remove grease, sheen, and minor imperfections.
- We applied two coats of oil-based primer, allowing proper dry time between each coat.
- Between coats, each surface was sanded again and cleaned to ensure optimal bonding and a smooth base for the topcoat.
This step-by-step priming process is essential for long-lasting durability, especially on older or high-use cabinetry.
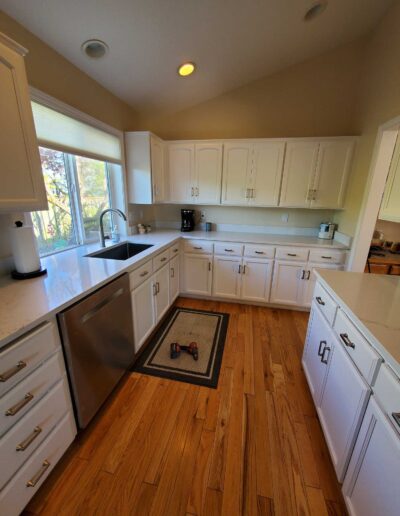
Step 3: Finishing with Gemini EVO Water-Based Lacquer
For the topcoat, we selected Gemini EVO Water-Based Lacquer, known for its superior hardness, low odor, and beautiful, furniture-grade finish.
- Two coats were applied by spray, using high-quality Air assisted sprayer for smooth, even coverage and a fine finish free of brush marks.
- The EVO lacquer dries quickly but was allowed sufficient cure time between coats to ensure proper bonding and sheen uniformity.
This product provides the durability of traditional lacquers with the low-VOC benefits of a water-based system—ideal for indoor applications.
Step 4: Reassembly and Final Detailing
After the finish fully cured:
- We reinstalled all doors and drawer fronts according to our original labeling system.
- All hardware and hinges were reattached, and alignment was checked on every piece.
- The surrounding area was thoroughly cleaned, and we walked through the final results with the homeowner to ensure everything met their expectations
Trim & Door Painting with Emerald Urethane
For the trim and interior doors, we used Sherwin-Williams Emerald Urethane Trim Enamel—a top-tier product known for its hard, durable finish.
- Surfaces were sanded and cleaned before priming where needed.
- Two coats of Emerald Urethane were applied via spray, using an airless sprayer for a smooth finish.
- All edges and corners were masked and protected to maintain clean transitions and prevent overspray.
Wall Painting with Sherwin-Williams SuperPaint
Once the cabinets and trim were completed, we moved on to the walls throughout the common areas.
- We used Sherwin-Williams SuperPaint, a trusted interior coating known for its washability, coverage, and consistent sheen.
- Walls were taped and protected for sharp cut-in lines where they meet trim, ceilings, and built-in features.
- Our team applied the paint using a brush and roll technique, allowing us to work the paint into textured surfaces and maintain control around detailed areas.
Ceiling Repaint with ProMar 200
To complete the transformation, we refreshed all ceilings in the common areas using Sherwin-Williams ProMar 200—a flat, low-sheen ceiling paint that provides a clean, uniform finish without glare.
- Ceilings were carefully prepped and cut in by hand for clean separation between wall and ceiling lines.
- A smooth roll application ensured consistent texture throughout, with no flashing or lap marks.
A Clean, Cohesive Interior and a Satisfied Homeowner
What made this Clackamas project shine was the combination of material quality, attention to detail, and a great homeowner who trusted our process from start to finish. Every element—from the smooth cabinet spray finish to the crisp trim lines and consistent coverage—came together for a clean, timeless result.