
Interior Cabinet Painting In Oregon City:
Precision, Prep, and a Professional Finish
We believe that great results begin with a great process—and this cabinet painting project in Oregon City was a perfect example. From the first conversation to the final reinstallation, we worked closely with a fantastic homeowner who valued the same attention to detail we bring to every job. The end result? A stunning cabinet transformation built to last.
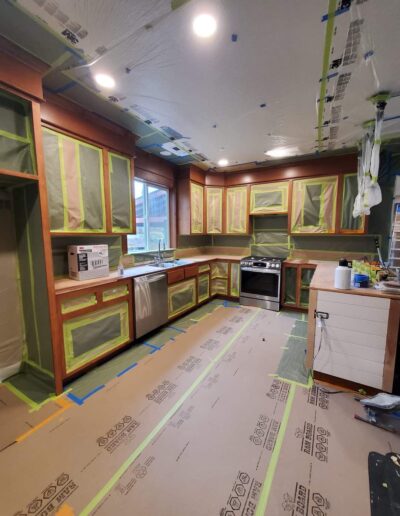
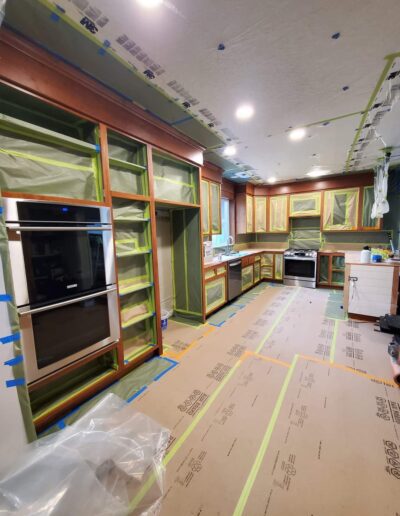
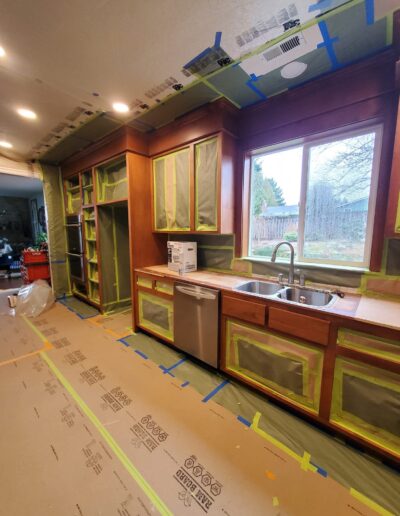
Step 1: Cabinet Disassembly & Labeling
We began by fully disassembling the kitchen cabinetry:
- All cabinet doors, drawer fronts, and hardware were removed and labeled carefully using a numbered system to ensure accurate reinstallation.
- Labels were placed discreetly and noted in a master tracking list, helping us maintain clear orientation and avoid mismatches during reassembly.
- Each piece was staged systematically in the designated spray zone and drying area to keep the project organized and efficient.
Step 2: Creating a Controlled Spray Environment
To maintain a clean, professional worksite and ensure a flawless finish, we built out dedicated spray and drying areas inside the home:
- A plastic-walled spray booth was installed to isolate the work area, prevent overspray, and control dust and airflow.
- A dry rack staging area was constructed within the same containment zone, allowing each door and drawer to cure in a clean environment between coats.
- We used a large air scrubber with ducting to safely vent fumes outdoors, reduce airborne particles, and keep the air safe and breathable inside the home.
Step 3: Surface Prep & Primer Application
With the space secure, we began the prep process:
- All surfaces were thoroughly cleaned and sanded to remove grease, sheen, and minor imperfections.
- We applied two coats of oil-based primer, allowing proper dry time between each coat.
- Between coats, each surface was sanded again and cleaned to ensure optimal bonding and a smooth base for the topcoat.
This step-by-step priming process is essential for long-lasting durability, especially on older or high-use cabinetry.
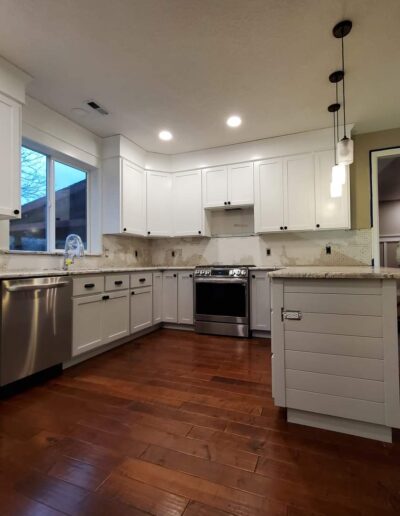
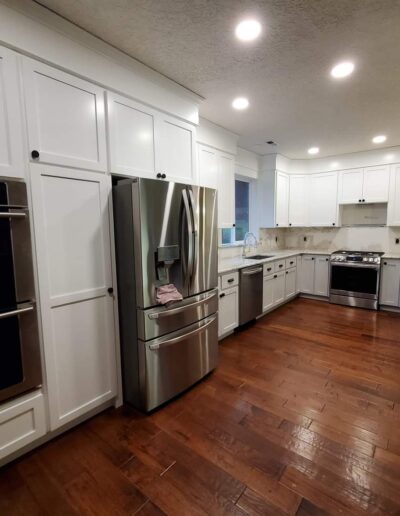
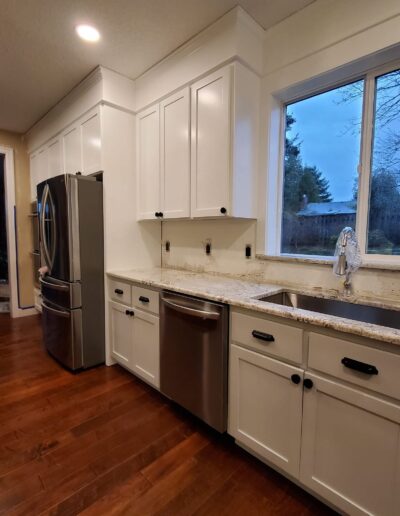
Step 4: Finishing with Gemini EVO Water-Based Lacquer
For the topcoat, we selected Gemini EVO Water-Based Lacquer, known for its superior hardness, low odor, and beautiful, furniture-grade finish.
- Two coats were applied by spray, using high-quality Air assisted equipment for smooth, even coverage and a fine finish and controlled overspray.
- The EVO lacquer dries quickly but was allowed sufficient cure time between coats to ensure proper bonding and sheen uniformity.
This product provides the durability of traditional lacquers with the low-VOC benefits of a water-based system—ideal for indoor applications.
Step 5: Reassembly and Final Detailing
After the finish fully cured:
- We reinstalled all doors and drawer fronts according to our original labeling system.
- All hardware and hinges were reattached, and alignment was checked on every piece.
- The surrounding area was thoroughly cleaned, and we walked through the final results with the homeowner to ensure everything met their expectations.
A Smooth Experience With a Great Customer
Working with this Oregon City client was a pleasure. They were thoughtful, communicative, and excited about the transformation—a true partner in the process. From choosing the right finish to maintaining a clean job site, their collaboration helped make this a seamless, successful project.